Wes’ build

  • Thread Starter
  • Thread starter
  • #21
After a bit of fun with my buddy from Idaho in town
I ripped off the front fender, flares from impact
Seems like with the wheel spacers instead of hitting the fender liners it hit the fenders themselves

It only damage the plastic clips on the back
Which was an easy fix when I got some from an auto shop instead of the local dealer
 

Attachments

  • IMG_4289.jpeg
    IMG_4289.jpeg
    148.2 KB · Views: 25
  • IMG_4314.jpeg
    IMG_4314.jpeg
    14.4 KB · Views: 24
  • IMG_4315.jpeg
    IMG_4315.jpeg
    41.9 KB · Views: 22
  • IMG_4312.jpeg
    IMG_4312.jpeg
    240.9 KB · Views: 23
  • Thread Starter
  • Thread starter
  • #22
Here are some pics of the generic clips which have a little more plastic than the dealer ones
 

Attachments

  • IMG_4353.jpeg
    IMG_4353.jpeg
    90.4 KB · Views: 5
  • IMG_4351.mov
    29 MB
  • IMG_4350.mov
    43.2 MB
  • IMG_4333.jpeg
    IMG_4333.jpeg
    147.5 KB · Views: 5
  • Thread Starter
  • Thread starter
  • #23
Here’s a quick couple pictures of my ACC relocation from turn off road
 

Attachments

  • IMG_4955.jpeg
    IMG_4955.jpeg
    579.1 KB · Views: 10
  • IMG_4956.jpeg
    IMG_4956.jpeg
    621.8 KB · Views: 10
  • IMG_4958.jpeg
    IMG_4958.jpeg
    608.8 KB · Views: 13
  • IMG_4964.jpeg
    IMG_4964.jpeg
    314.9 KB · Views: 11
  • IMG_4963.jpeg
    IMG_4963.jpeg
    292.1 KB · Views: 12
I over did it with a 50mm spacer
I’m going smaller soon

Is there an issue with the spacer? Concerns with the contact you made when jumping? I am looking at doing something now in preparation for larger tires.

Do you have any pics of the clearance between the UCA and current setup?
 
  • Thread Starter

  • Thread starter
  • #25
Here are some pics of my home made wench mount and tubular bumper
With the little extra support bracket on frame rails
Not bad for $250 🤣🤷‍♂️
 

Attachments

  • IMG_4982.jpeg
    IMG_4982.jpeg
    212 KB · Views: 9
  • IMG_4980.mov
    11.4 MB
  • IMG_4990.jpeg
    IMG_4990.jpeg
    353 KB · Views: 9
  • IMG_4991.jpeg
    IMG_4991.jpeg
    367.1 KB · Views: 8
  • IMG_4997.jpeg
    IMG_4997.jpeg
    219.1 KB · Views: 9
  • Thread Starter
  • Thread starter
  • #26
Here is a video with the bumper almost done
I’d like to add some more plate to the one middle area
And finish fog lights and parking sensors
Just multi tasking too much

Side note the Bull bar blocks the ACC
May have to make it about 2” shorter
 

Attachments

  • IMG_5067.mov
    39.3 MB
Last edited:
  • Thread Starter
  • Thread starter
  • #27
While doing the bumper
I was able to pull the stock exhaust muffler (For sale)
And replace it with a summit racing one, and the stock resonators

As well as cover it all up with some 3/16” steel skid plate I made

I know a lot of these photos have some decently hack, cutting and welding in them
But we were in a rush to get it done

And I have since re-grind it and welded some of the ghetto areas
🤣🤷‍♂️
 

Attachments

  • IMG_2924.jpeg
    IMG_2924.jpeg
    415.6 KB · Views: 4
  • IMG_2920.jpeg
    IMG_2920.jpeg
    203.6 KB · Views: 4
  • IMG_5106.jpeg
    IMG_5106.jpeg
    402.1 KB · Views: 4
Last edited:
  • Thread Starter
  • Thread starter
  • #28
Also got the OEM beadlocks that came in installed last week
 

Attachments

  • IMG_5163.jpeg
    IMG_5163.jpeg
    265.4 KB · Views: 4
  • Thread Starter
  • Thread starter
  • #29
Pretty straight forward to install
Just make sure to lube tire area where it contacts
And torque to spec
I actually went over the recommended 47 ft lbs to 50
And double cycled it to make sure there were no stragglers that were loose
 

Attachments

  • IMG_5219.png
    IMG_5219.png
    181 KB · Views: 5
  • IMG_5149.jpeg
    IMG_5149.jpeg
    311.1 KB · Views: 5
  • IMG_5151.jpeg
    IMG_5151.jpeg
    295.4 KB · Views: 5
  • Thread Starter
  • Thread starter
  • #30
Popped some of these door jamb protectors from IAG on
Pretty decent for the price point
Can’t complain
And made a battery cut off switch for the wench
 

Attachments

  • IMG_5162.jpeg
    IMG_5162.jpeg
    218.9 KB · Views: 4
  • IMG_5167.jpeg
    IMG_5167.jpeg
    192.5 KB · Views: 5
  • IMG_5166.jpeg
    IMG_5166.jpeg
    327.7 KB · Views: 5
  • IMG_5165.jpeg
    IMG_5165.jpeg
    359 KB · Views: 4
  • Thread Starter
  • Thread starter
  • #31
Also put on the Molle door pockets, and rear seat carpet protectors from IAG
Again nothing fancy
But it helps
They just Velcro to the “carpet” area
I wish it had more contact area to stick tho, no issue coming loose yet, but I like things overkill
 

Attachments

  • IMG_5141.jpeg
    IMG_5141.jpeg
    210.3 KB · Views: 6
  • IMG_5144.jpeg
    IMG_5144.jpeg
    257.1 KB · Views: 5
  • Thread Starter
  • Thread starter
  • #32
Armor lite rubber flooring showed up early
Actually like 3 days after purchase
Said it would not even ship till like the 17th on the website
Pics and install soon
 

Attachments

  • IMG_5161.jpeg
    IMG_5161.jpeg
    568.7 KB · Views: 3
  • Thread Starter
  • Thread starter
  • #33
Is there an issue with the spacer? Concerns with the contact you made when jumping? I am looking at doing something now in preparation for larger tires.

Do you have any pics of the clearance between the UCA and current setup?
I don’t have any pictures, but I’ll get you one as soon as I get home from work

I was afraid that the normal spacing that everyone else uses would not be enough for my super nobby mud terrain tires

I also had to have the vehicle for my daily driver, so I kind of made it overly big just to make sure there was no issue
 
  • Thread Starter
  • Thread starter
  • #34
Is there an issue with the spacer? Concerns with the contact you made when jumping? I am looking at doing something now in preparation for larger tires.

Do you have any pics of the clearance between the UCA and current setup?
Banana for scale
 

Attachments

  • IMG_5232.jpeg
    IMG_5232.jpeg
    252 KB · Views: 10
  • Thread Starter
  • Thread starter
  • #35
Got some work done on the bumper area today
Wish I had a decent welder with gas 🙄
Oh well should still keep rocks away

I also plan on trimming the factory skid plate to make one smooth transition from the corner of the frame support all the way up following the tubing on the bumper
To make it more flush
 

Attachments

  • IMG_5306.jpeg
    IMG_5306.jpeg
    414.8 KB · Views: 6
Last edited:
  • Thread Starter
  • Thread starter
  • #36
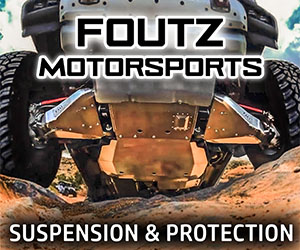
I also installed my Foutz Motorsport control arm skid plates
 

Attachments

  • IMG_5301.jpeg
    IMG_5301.jpeg
    186.3 KB · Views: 5
  • Thread Starter
  • Thread starter
  • #37
It was much more difficult than I thought. I was kind of bummed it did not go so easily.
There were still powder coating and material on the threads for the brackets

So I had to run to the store and get a tap and die kit to clean them up

It actually began to strip out some of the threads and one of the bolts from trying to just install them by hand
 
  • Thread Starter
  • Thread starter
  • #38
The Bolin in a few threads like normal with no issue
But then upon trying to tighten them and began to bind up and even twist and bend one of the center brackets from the amount of force to try to overcome the debris on the threads

Also, once you install the center arms, they do not up correctly from having to stretch over top of the aluminum support
 

Attachments

  • IMG_5297.jpeg
    IMG_5297.jpeg
    48 KB · Views: 2
  • Thread Starter
  • Thread starter
  • #39
The two side brackets also do not seem to be flush, but this could be for a reason strategically
I’m not sure, but I would think setting flush would be better
 

Attachments

  • IMG_5296.mov
    34.3 MB
  • Thread Starter
  • Thread starter
  • #40
After fooling around with a couple strategies to get them on there
Which admittedly is not rocket science

They did seem to fit snuggly and securely around the control arms were just the perfect amount of clearance

Once I was able to get one on
Obviously, the other side went much faster

I think the skid plate is perfect
But the brackets could maybe use a little tweaking

Overall, still pretty happy with the product 👍😎
 
Back
Top