Mirror Dashcams: The Mod You Didn’t Know You Needed | Chasing Dust - By Driving Line

TurboS

Moderator
Staff member
Founding Member
Feb 24, 2022
2,698
Gallery
790
3,787
Michigan
Current Ride
2022 Bronco Raptor
By our very First BROTM winner, and our First BROTM repeat winner: @DesertChief

"Many off-road and overland builds have components on them that make rear visibility a challenge. Whether it’s a camper, bed rack, or simply an oversized spare tire, seeing out of the back window is a sacrifice many off-roaders have to make. But luckily, there are products available now that are a solution to visibility issues at the rear of your vehicle, and pack many more features into them that you may find valuable for your rig.
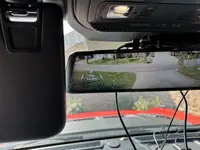
On this episode, Matt’s talking about his new rearview mirror dashcam and rear camera, the G850 from Wolfbox. This product covers or replaces your factory rearview mirror, provides a 4K forward-facing dash cam, and a rear-facing 1080p camera. The mirror itself is your monitor, and gives you a better view of behind your vehicle, with a loop-record function to both capture your off-road adventures, as well as your daily driving. This solution serves many purposes, both in security, evidence for collisions, and recording your off-road adventures.
Matt describes what comes with the Wolfbox, and shows you how he installed it on his 2022 Bronco Raptor, before giving his initial review of the product. While there are many rearview mirror dashcams on the market, few are geared towards off-road and overlanding enthusiasts. But at $150, Matt is very happy with the Wolfbox and the value it brings to his driving experience."

00:00 | Intro
02:31 | Unboxing the WolfBox
05:58 | Wolfbox Mirror Dashcam Bronco Installation
10:38 | Wolfbox Mirror Dashcam Review
12:14 | Wrap-Up

 
DARN IT..... Always been curious about them, but haven't been willing to dig into the details on one. Now I have no excuse. Pretty simple install. Amazon here I come -$$$

Oh and here's an easy adaptor to tap in for power.

The only thing I'll need to figure out is if I can mount the camera outside rather than inside on the top. I still want to be able to easily remove my top in the summer. Fab a license plate bracket maybe. Won't be as easy an install but more flexible.
 
Wonder where the GPS is mounted?

Also, assuming you have to run it on all the time to record, as in you can't flip into just standard reflective rear view mirror if you don't want the camera views?
 
All right I bought the G900 and installed it in a couple of hours.
The GPS I just left tucked up in the space between the visors by the switches and it works just fine.
I ran my camera all the way to the back and installed it right above my license plate with a small piece of gorilla tape. The tape that came with the kit didn’t hold. The worst part is finding a hole from the inside around the rear lights to outside of the truck. Interested to know where others ran a wire from inside to outside for reverse lights etc.

The only issues I have with it are:
1. Drivers side visor doesn’t work anymore. The mirror because it is 12” wide and sits offset towards the driver to clear the camera so it prevents you from flipping the visor all the way forward against the glass. Fine for me at 6’ but doesn’t work for my 5’ tall wife.
2. Camera Installed outside at the license plate works great since I’ll still be able to take my top off. However, when it rains a drop of water on the lens causes all sort of issues with the image.
 
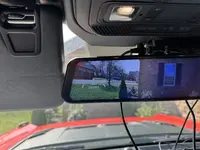
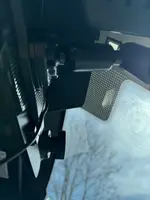
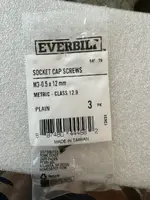
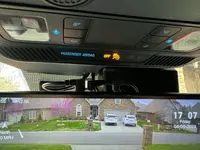
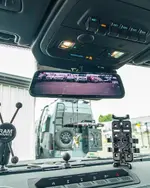
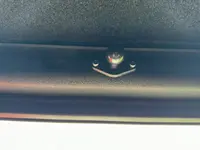
I purchased a Wolfbox G900. I also purchased the OEM bracket. The screws provided for the OEM bracket are two long and would leave a slight wobble in the mirror. I found a solution at Home Depot that worked perfect. I had a slight concern about using the drivers sunshade as stated in other post. Using the OEM bracket from Wolfbox helps. I can use my sunshade by slightly moving the mirror to the right. I have not hard wired everything yet but wanted to post this info in case anyone was on the fence with the purchase. This thing is Awesome so far especially for the price.
 

Attachments

  • IMG_4524.jpeg
    IMG_4524.jpeg
    245.4 KB · Views: 52
  • IMG_4525.jpeg
    IMG_4525.jpeg
    260.6 KB · Views: 49
  • IMG_4527.jpeg
    IMG_4527.jpeg
    99.5 KB · Views: 54
  • IMG_4532.jpeg
    IMG_4532.jpeg
    237.6 KB · Views: 51
Last edited:
I purchased a Wolfbox G900. I also purchased the OEM bracket. The screws provided for the OEM bracket are two long and would leave a slight wobble in the mirror. I found a solution at Home Depot that worked perfect. I had a slight concern about using the drivers sunshade as stated in other post. Using the OEM bracket from Wolfbox helps. I can use my sunshade by slightly moving the mirror to the right. I have not hard wired everything yet but wanted to post this info in case anyone was on the fence with the purchase. This thing is Aweaome so far especially for the price.
I am considering this as I have a ton of windshield time.

Is the rear camera waterproof? I want to remove my top on occasion (who doesn't - am I right? ;-) so installing the camera on the cross beam inside or the third brake light would be great. Any other suggestions?
 
I am considering this as I have a ton of windshield time.

Is the rear camera waterproof? I want to remove my top on occasion (who doesn't - am I right? ;-) so installing the camera on the cross beam inside or the third brake light would be great. Any other suggestions?
I am pretty sure the rear camera is waterproof. They do sale a license plate mounting bracket for it so I would assume it is. There is not a lot of info on their website with the exception of the accessories section which states that rear camera is waterproof and it does look like the one that comes with the G900. The rear cameras have a foot of wire and do plug into the main supplied wire harness so replacing one would be pretty easy.

I do not plan on taking my rear roof section off so I will be fabricating a metal bracket to permanently mount my rear camera too in the near future. Right now I am using 3m tape and have it stuck to the roof on the weather seal.

I bought some IAG led interior lights so I am going to take the interior upper trim panels off too run the wiring for these and at the same time run the wiring to the rear of my bronco to conceal the wire as much as possible. As soon as I get some time off and have some good weather I will post some pics.
 
All right I bought the G900 and installed it in a couple of hours.
The GPS I just left tucked up in the space between the visors by the switches and it works just fine.
I ran my camera all the way to the back and installed it right above my license plate with a small piece of gorilla tape. The tape that came with the kit didn’t hold. The worst part is finding a hole from the inside around the rear lights to outside of the truck. Interested to know where others ran a wire from inside to outside for reverse lights etc.

The only issues I have with it are:
1. Drivers side visor doesn’t work anymore. The mirror because it is 12” wide and sits offset towards the driver to clear the camera so it prevents you from flipping the visor all the way forward against the glass. Fine for me at 6’ but doesn’t work for my 5’ tall wife.
2. Camera Installed outside at the license plate works great since I’ll still be able to take my top off. However, when it rains a drop of water on the lens causes all sort of issues with the image.
How did you power it?
 
I bought the power adaptor that just taps into the OBD port. I was feeling lazy when I bought it and that seemed like the easiest option. I didn't have to find an appropriate fuse that I could put a tap into.

Also in hindsight I would not mount the camera down by my license plate. I towed my boat out of storage for the first time since I put the camera in and all I see is the bottom of my boat now when towing. So I will be taking it apart this spring when it gets a little warmer and rerunning it all down the passenger side under the door sills and then out through the tailgate harness and remounting the camera on the third brake light up high.
 
Last edited:
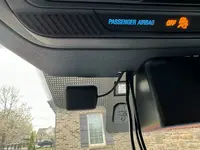
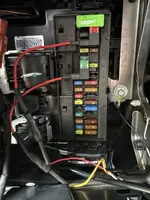
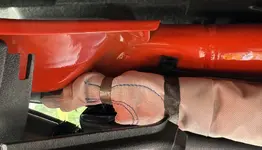
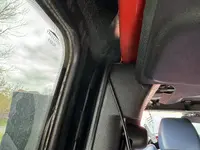
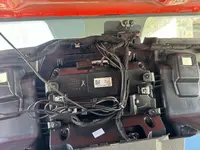
I finished mine up with the exception of where I am going to finally mount it in the back. I ran the wiring along the side curtain airbags and to the rear of the vehicle. I am working on a factory look for the rear and will post those pics when its done. I took my upper console down and tucked the wiring in behind it. You can also see where I mounted the GPS sensor, which works great. I hard wired it to the fuse panel. I use the Wolfbox hard wire kit and attacked my own add a fuse kit.
 

Attachments

  • IMG_5509.jpeg
    IMG_5509.jpeg
    299.3 KB · Views: 46
  • IMG_5510.jpeg
    IMG_5510.jpeg
    317.2 KB · Views: 48
  • IMG_5507.jpeg
    IMG_5507.jpeg
    174.3 KB · Views: 49
  • IMG_5498.jpeg
    IMG_5498.jpeg
    219.7 KB · Views: 48
  • IMG_5497.jpeg
    IMG_5497.jpeg
    317.4 KB · Views: 46
  • IMG_5511.jpeg
    IMG_5511.jpeg
    258.5 KB · Views: 46
  • IMG_5331.jpeg
    IMG_5331.jpeg
    235.5 KB · Views: 44
  • IMG_5312.jpeg
    IMG_5312.jpeg
    332.7 KB · Views: 43
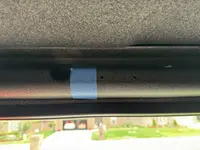
Installed it yesterday. I mounted the rear camera on the back cross brace, but I don't like it there. I am considering mounting it on top of the third brake light. Wiring through the tailgate looks easy enough - does anyone have any experience?
 
Installed it yesterday. I mounted the rear camera on the back cross brace, but I don't like it there. I am considering mounting it on top of the third brake light. Wiring through the tailgate looks easy enough - does anyone have any experience?
I saw someone on Facebook that mounted theirs the way your thinking too. I believe if was on one of the Bronco Raptor pages.

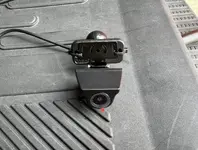
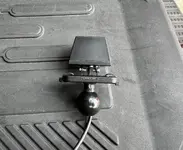
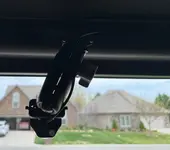
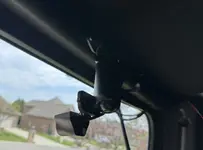
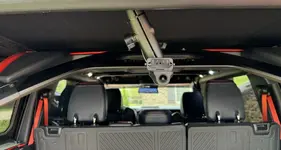
I thought about that route as well but did not like the look. I have my rear camera wire run to the back of the bronco via the upper panels. I have to finish my wiring up next week. My plan is to mount a ram ball mount to the inside trim panel just inside the swing up rear glass. I will attach the rear camera to a small ram arm and it will be a few inches from the rear swing up glass and give me very good visibility while protecting the camera from the elements. I have it temporarily mounted this way and it works great.
 
I like your assessment. Playing in dirt and mud will have more consequences than I considered. Looks like I'll go for hanging it near the top of the rear glass.

Thank you for your input!
 
I saw someone on Facebook that mounted theirs the way your thinking too. I believe if was on one of the Bronco Raptor pages.

I thought about that route as well but did not like the look. I have my rear camera wire run to the back of the bronco via the upper panels. I have to finish my wiring up next week. My plan is to mount a ram ball mount to the inside trim panel just inside the swing up rear glass. I will attach the rear camera to a small ram arm and it will be a few inches from the rear swing up glass and give me very good visibility while protecting the camera from the elements. I have it temporarily mounted this way and it works great.
I'm planning my G900 install and am interested in the mounting location you're talking about. Do you have any pictures of the location, even though temporary?

I was going to install inside the glass, center at the top of the hardtop, similar to the YouTube install video did on his Raptor. However, I don't like the idea of losing the ability to remove the hardtop. I wonder, can you install two mounting locations: one on the hardtop and an alternative on the rear cross bar for allowance to pull the top?

Since the rear camera has the plug, I would think it wouldn't be too difficult to extend the wire from the cross bar back to the rear glass. Thoughts on whether it's feasible? I too don't want to install on the outside for fear of the elements and a wet/useless camera.
 
I didn't take photos of the original spot on top of the crossbar (where it says Ford Performance). The view wasn't much better than the original mirror (the break light was in the way), and the picture quality was junk. I used the three-piece mount and mounted it on the center of the weatherstripping of the top back window. I used the mounting sticker, drilled some very small pilot holes, and used the supplied screws. Worked.

I would like to do the same - remove the hardtop. The mounting bracket is attached to the camera by two very small screws. Remove them, and the camera is free of the hard top. Use the two-piece mount with the mounting sticker and you are good to go.

Truthfully - I put way too much thought into this project. It is not as hard as it seems. I am a fan of a clean install. Take your time - don't rush it, and you'll do fine. The outcome is worth it.
 
I'm planning my G900 install and am interested in the mounting location you're talking about. Do you have any pictures of the location, even though temporary?

I was going to install inside the glass, center at the top of the hardtop, similar to the YouTube install video did on his Raptor. However, I don't like the idea of losing the ability to remove the hardtop. I wonder, can you install two mounting locations: one on the hardtop and an alternative on the rear cross bar for allowance to pull the top?

Since the rear camera has the plug, I would think it wouldn't be too difficult to extend the wire from the cross bar back to the rear glass. Thoughts on whether it's feasible? I too don't want to install on the outside for fear of the elements and a wet/useless camera.
I will try to have some pics and a little more info listed in the next day or two.
 
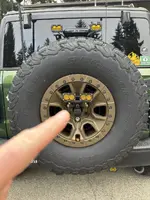
I bought the Brand Motion one and mounted the camera on my Fast Intentions chase light bracket. Works well except in heavy rain. I assume Brand Motion recommends mounting it inside the spare tire to give it some protection from the rain. Can be turned off and used as an old school mirror if you want a nice view of your spare
 

Attachments

  • IMG_4732.jpeg
    IMG_4732.jpeg
    183.9 KB · Views: 20
  • IMG_4734.jpeg
    IMG_4734.jpeg
    133.3 KB · Views: 21
  • image.jpg
    image.jpg
    224.9 KB · Views: 20
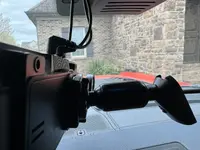
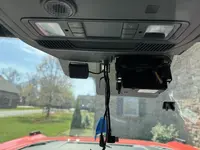
I have my rear camera finally mounted with RAM mounts. I am still fine tuning a few things and have to finish hiding the wiring but essentially it’s done.
 

Attachments

  • IMG_5772.jpeg
    IMG_5772.jpeg
    327.2 KB · Views: 28
  • IMG_5775.jpeg
    IMG_5775.jpeg
    266.7 KB · Views: 25
  • IMG_5777.jpeg
    IMG_5777.jpeg
    507.1 KB · Views: 25
  • IMG_5780.jpeg
    IMG_5780.jpeg
    470.1 KB · Views: 27
  • IMG_5782.jpeg
    IMG_5782.jpeg
    114 KB · Views: 27
  • IMG_5783.jpeg
    IMG_5783.jpeg
    120.2 KB · Views: 28
  • IMG_5784.jpeg
    IMG_5784.jpeg
    163.2 KB · Views: 27

Top Member Reactions

Back
Top