🛠️ Member Build Wes’ build

Member Build

Turbo yzel

Well-known member
Joined
Oct 9, 2023
Messages
173
Gallery
104
Reaction score
255
Location
DMV
Current Ride
2022 Braptor
Hoping to consolidate a lot of my posts by putting them all in one build thread

To help myself and others track down info and helpful photos etc,
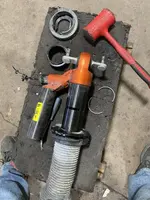
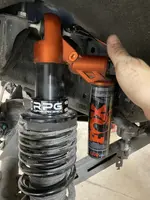
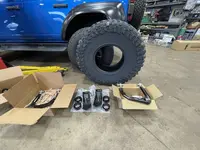
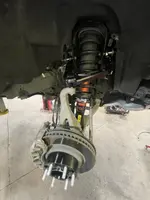
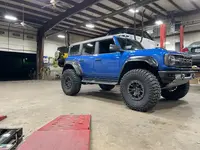
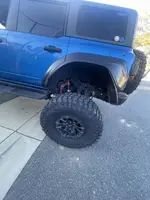
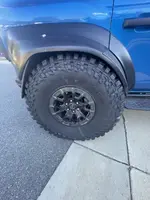
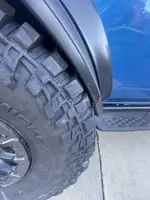
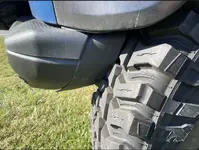
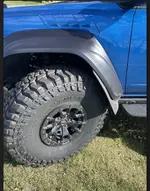
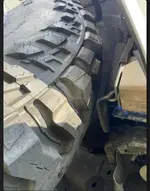
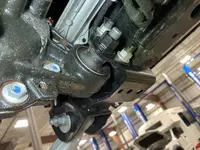
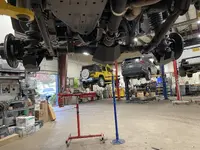
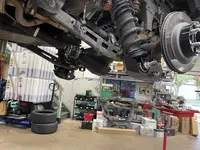
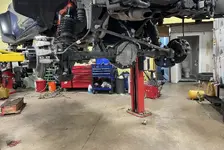
Starting with the first thing I did the 3” perch collers and 40”s
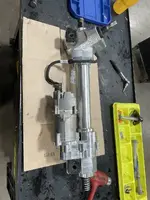
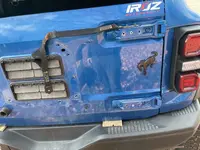
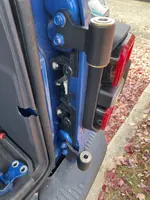
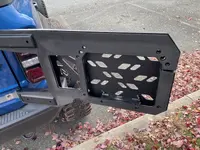
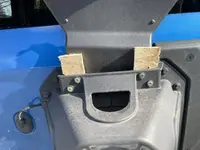
Then the 74 weld rack
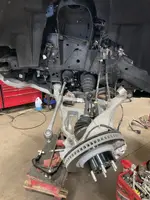
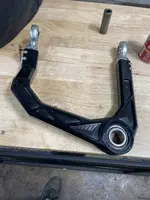
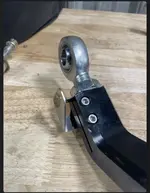
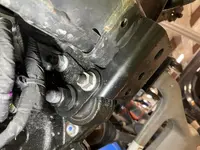
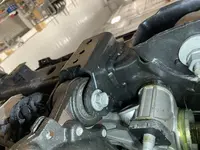
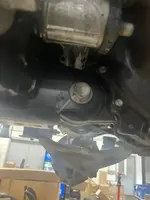
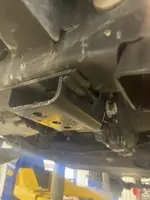
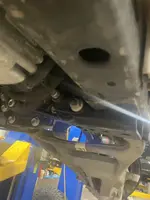
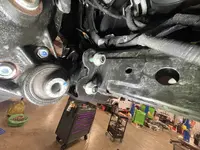
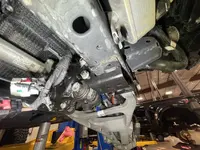
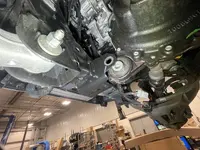
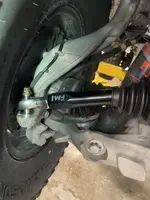
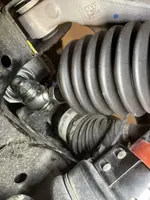
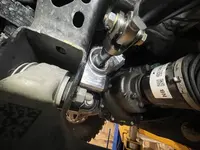
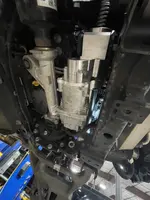
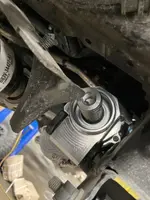
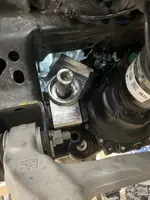
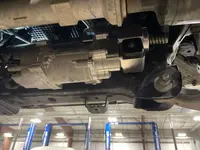
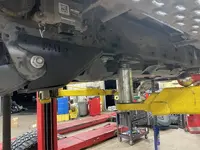
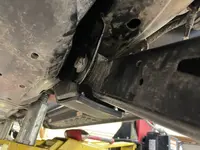
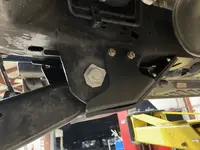
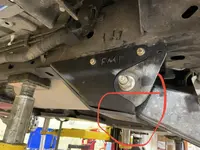
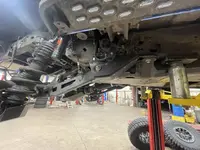
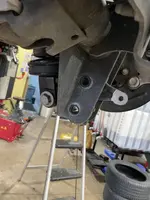
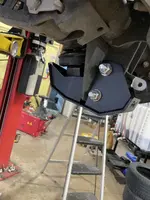
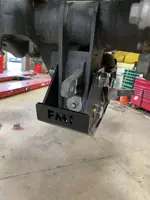
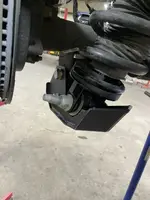
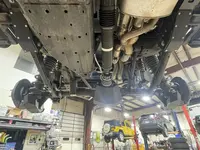
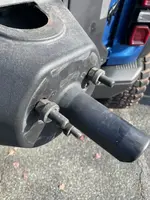
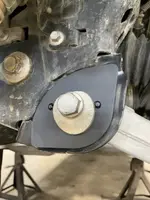
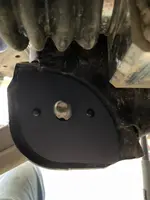
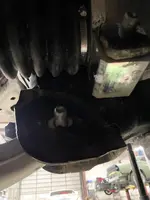
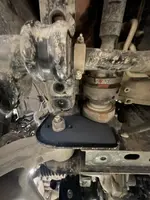
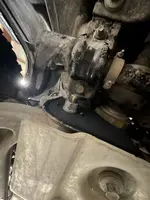
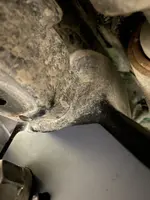
Foutz diff/frame/ and shock skids
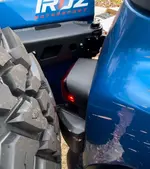
OEM Bead-locks
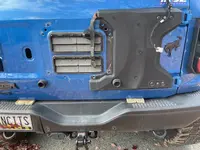
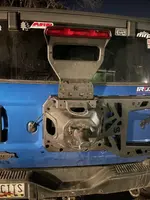
Tubular bumper and wench
Rubber flooring swap
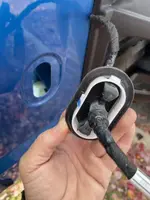
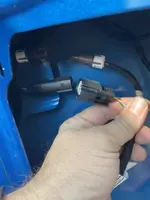
And misc things
 
Last edited:
First up installing the perch collars
I had to use what I thought was a little bit more effort than I assumed with the rubber mallet to pop off the factory collars
After which it was quite easy to just bolt on the new ones
And torque them the spec
 

Attachments

  • IMG_1308.webp
    IMG_1308.webp
    280 KB · Views: 83
  • IMG_1309.webp
    IMG_1309.webp
    134.3 KB · Views: 79
  • IMG_1307.webp
    IMG_1307.webp
    261.3 KB · Views: 82
Next, I found it easiest
To just loosen and set aside most of the vacuum hoses and ABS wire, brake lines, etc.
Just move them off to the side
Then undo your tie rod and control arm bolts

It left me enough room that I was able to just push down with a prybar
And pop out the suspension and strut set up
And then reinstall
 

Attachments

  • IMG_5203.webp
    IMG_5203.webp
    161.4 KB · Views: 70
By doing it this way, I did not have to mess with the CV axle or anything else that I thought I may have to
 

Attachments

  • IMG_5204.webp
    IMG_5204.webp
    96.4 KB · Views: 60
Here are some pictures of the Foutz Motorsport upper control arms

I was super impressed by the quality and ease of installation with the parts

I wish I’d gotten more pictures, but we were really in a time crunch to be able to use the shop after hours

This seemed like the correct orientation of the live valve bracket from other pics I saw
 

Attachments

  • IMG_5206.webp
    IMG_5206.webp
    156.2 KB · Views: 59
  • IMG_5205.webp
    IMG_5205.webp
    295.3 KB · Views: 61
  • IMG_5207.webp
    IMG_5207.webp
    80 KB · Views: 64
Last edited:
Looking good after install
 

Attachments

  • IMG_5209.webp
    IMG_5209.webp
    282.8 KB · Views: 106
  • IMG_5208.webp
    IMG_5208.webp
    206.7 KB · Views: 105
Parking lot test today
I cannot confirm it is 100% articulation
As I was by myself with no’s spotter, in a rush on the way home from the game

But it seems to clear even the rear fenders with just the tiniest amount of rubbing noticeable
 

Attachments

  • IMG_5210.webp
    IMG_5210.webp
    553.2 KB · Views: 82
  • IMG_5211.webp
    IMG_5211.webp
    182.9 KB · Views: 79
  • IMG_5212.webp
    IMG_5212.webp
    171.4 KB · Views: 79
  • IMG_5213.webp
    IMG_5213.webp
    161 KB · Views: 76
  • IMG_5214.webp
    IMG_5214.webp
    133.3 KB · Views: 79
Got the shocks recalibrated and did some flex testing
Brake lines look ok
Rear bumper plastic was hitting
Pulled it off for now until bumper upgrade
Hard to tell the front is pushed up, but it seemed to have plenty of clearance after the fog light and bumper end removal
 

Attachments

  • IMG_5215.webp
    IMG_5215.webp
    150.7 KB · Views: 62
  • IMG_5216.webp
    IMG_5216.webp
    101.5 KB · Views: 59
  • IMG_5217.webp
    IMG_5217.webp
    171.8 KB · Views: 58
  • IMG_5218.webp
    IMG_5218.webp
    88.7 KB · Views: 60
Next up was the install of the 74 weld billet steering rack
Here are some pictures of the install
And some pictures of the mounts and old rack etc
First thing I noticed was the raptor has a different FDU mounting system than other videos I’ve watched for install

It seems like the raptor has extra support and some parts welded to the subframe
As well as a “warthog” sticker 🤣
 

Attachments

  • IMG_2169.webp
    IMG_2169.webp
    228.2 KB · Views: 59
  • IMG_2168.webp
    IMG_2168.webp
    233.6 KB · Views: 62
  • IMG_2167.webp
    IMG_2167.webp
    239.6 KB · Views: 59
  • IMG_2166.webp
    IMG_2166.webp
    54.5 KB · Views: 64
  • IMG_2165.webp
    IMG_2165.webp
    57.3 KB · Views: 61
  • IMG_2164.webp
    IMG_2164.webp
    60.2 KB · Views: 63
  • IMG_2182.webp
    IMG_2182.webp
    105.9 KB · Views: 65
  • IMG_2183.webp
    IMG_2183.webp
    274.1 KB · Views: 65
  • IMG_2184.webp
    IMG_2184.webp
    270 KB · Views: 60
  • IMG_2185.webp
    IMG_2185.webp
    285.2 KB · Views: 59
  • IMG_2186.webp
    IMG_2186.webp
    317.6 KB · Views: 58
  • IMG_2187.webp
    IMG_2187.webp
    300.2 KB · Views: 57
  • IMG_2188.webp
    IMG_2188.webp
    255.4 KB · Views: 59
Last edited:
Here are some pictures of me marking some of the steering components to make sure they’re lined up
As well as pictures of the mounts and one hard to reach wire that needs to be removed
And one bolt that likes to try and run itself into one of the hoses
Sorry for not being more specific as this was almost 6 months ago
 

Attachments

  • IMG_2175.webp
    IMG_2175.webp
    140.4 KB · Views: 50
  • IMG_2174.webp
    IMG_2174.webp
    76.1 KB · Views: 50
  • IMG_2173.webp
    IMG_2173.webp
    82.4 KB · Views: 53
  • IMG_2172.webp
    IMG_2172.webp
    187.5 KB · Views: 51
  • IMG_2171.webp
    IMG_2171.webp
    121.8 KB · Views: 49
  • IMG_2170.webp
    IMG_2170.webp
    283.5 KB · Views: 51
Here are some of switching the circuit board and steering system into the new housing
 

Attachments

  • IMG_2176.webp
    IMG_2176.webp
    181.3 KB · Views: 49
  • IMG_2177.webp
    IMG_2177.webp
    118.4 KB · Views: 49
  • IMG_2178.webp
    IMG_2178.webp
    109.1 KB · Views: 47
  • IMG_2179.webp
    IMG_2179.webp
    130.8 KB · Views: 48
  • IMG_2180.webp
    IMG_2180.webp
    184.8 KB · Views: 46
  • IMG_2190.webp
    IMG_2190.webp
    156.3 KB · Views: 47
Here are some of the finished housing install
It was a little tricky, remembering how to get it in there
Just like some of the videos, you have to keep rotating it and twisting it around
But it will eventually pop right in there

There are also some pictures of the Foutz Motorsport billet tie rod install
 

Attachments

  • IMG_2199.webp
    IMG_2199.webp
    115.3 KB · Views: 51
  • IMG_2198.webp
    IMG_2198.webp
    161.6 KB · Views: 56
  • IMG_2200.webp
    IMG_2200.webp
    145.6 KB · Views: 53
  • IMG_2194.webp
    IMG_2194.webp
    90.2 KB · Views: 50
  • IMG_2193.webp
    IMG_2193.webp
    93.5 KB · Views: 50
  • IMG_2192.webp
    IMG_2192.webp
    112.6 KB · Views: 49
  • IMG_2191.webp
    IMG_2191.webp
    148.1 KB · Views: 48
  • IMG_2190.webp
    IMG_2190.webp
    156.3 KB · Views: 49
Next up I got some underside protection from @foutzmotorsports
For the rear diff, shock skids , and rear trailing arm skid/sliders
 
Last edited:
Looks great!! I like that you were able to keep the stock wheels- I am assuming you used a spacer there- what size? Exactly what size tires are they?
 
Looks great!! I like that you were able to keep the stock wheels- I am assuming you used a spacer there- what size? Exactly what size tires are they?
I over did it with a 50mm spacer
I’m going smaller soon
 
I did have to drop the gas tank down a couple inches
Trim off the flag piece of the bolt as mentioned
But I really had a hard time getting them to line up
When the suspension was at full droop with the new 3 inch lift collars
It was contacting part of the skid plates, making it hard for the holes to line up
 

Attachments

  • IMG_1322.webp
    IMG_1322.webp
    206.6 KB · Views: 56
  • IMG_1323.webp
    IMG_1323.webp
    136.5 KB · Views: 57
  • IMG_1324.webp
    IMG_1324.webp
    137.8 KB · Views: 57
  • IMG_1325.webp
    IMG_1325.webp
    154.3 KB · Views: 61
  • IMG_1326.webp
    IMG_1326.webp
    199.6 KB · Views: 56
  • IMG_1310.webp
    IMG_1310.webp
    94.3 KB · Views: 57
  • IMG_1311.webp
    IMG_1311.webp
    101.2 KB · Views: 56
  • IMG_1312.webp
    IMG_1312.webp
    86.7 KB · Views: 57
  • IMG_1313.webp
    IMG_1313.webp
    86.5 KB · Views: 54
  • IMG_1316.webp
    IMG_1316.webp
    298.9 KB · Views: 56
  • IMG_1315.webp
    IMG_1315.webp
    281.3 KB · Views: 57
  • IMG_1314.webp
    IMG_1314.webp
    268.6 KB · Views: 56
  • IMG_1327.webp
    IMG_1327.webp
    216.4 KB · Views: 55
Next up was my turn off road spare tire carrier and upgraded hinges

Here are some pictures from the install
As well as the ghetto fabulous third break light spacing that I had to do to keep it from shaking around
And adding some old Lugnuts to space the tire out from hitting it
🤣🤷‍♂️
 

Attachments

  • IMG_2026.webp
    IMG_2026.webp
    77.4 KB · Views: 61
  • IMG_2025.webp
    IMG_2025.webp
    68.3 KB · Views: 61
  • IMG_2028.webp
    IMG_2028.webp
    343.7 KB · Views: 57
  • IMG_2029.webp
    IMG_2029.webp
    237.9 KB · Views: 55
  • IMG_2030.webp
    IMG_2030.webp
    228.7 KB · Views: 59
  • IMG_2031.webp
    IMG_2031.webp
    146.1 KB · Views: 57
  • IMG_2034.webp
    IMG_2034.webp
    245.3 KB · Views: 54
  • IMG_2035.webp
    IMG_2035.webp
    331 KB · Views: 54
  • IMG_2027.webp
    IMG_2027.webp
    344.8 KB · Views: 61
  • IMG_2024.webp
    IMG_2024.webp
    289.4 KB · Views: 57
  • IMG_2023.webp
    IMG_2023.webp
    190.9 KB · Views: 56
After a quick and easy call to @turnoffroad
They were able to hook me up with a brake light spacing kit
I will say for raptor owners that you will need a bigger bump stop tab
As it will hit our bigger rear brake lights before it stops itself on the factory size tab
Seems like we need just about 10 MM of thickness to keep from hitting
 

Attachments

  • IMG_2370.webp
    IMG_2370.webp
    134.6 KB · Views: 55
  • IMG_2368.webp
    IMG_2368.webp
    72.1 KB · Views: 54
  • IMG_2369.webp
    IMG_2369.webp
    82.3 KB · Views: 54
  • IMG_2447.webp
    IMG_2447.webp
    122.6 KB · Views: 52
  • IMG_2446.webp
    IMG_2446.webp
    93.7 KB · Views: 55
  • IMG_2371.webp
    IMG_2371.webp
    83.1 KB · Views: 57
Last edited:
Up next
The @FoutzMotorsport Slot delete kit for the lower control arm
This was pretty straightforward to install
These pics are the only ones I currently have of the temporary install before it was welded

I did find that I had to remove 2 bolts for the sway bar to get the control arm bolts out
As shown in a pic
Can’t get one out without hitting other

After doing so, I flipped them around in case I ever need to make a repair on the trail and it’s one less thing I have to mess with

And remember to lift up the one plate with the OEM weld for clearance

Will put the updated welding pics as soon as I find them
 

Attachments

  • IMG_3607.webp
    IMG_3607.webp
    88.9 KB · Views: 63
  • IMG_3606.webp
    IMG_3606.webp
    47.6 KB · Views: 63
  • IMG_3605.webp
    IMG_3605.webp
    70.1 KB · Views: 64
  • IMG_3608.webp
    IMG_3608.webp
    103.4 KB · Views: 65
  • IMG_3610.webp
    IMG_3610.webp
    84.9 KB · Views: 58
  • IMG_3609.webp
    IMG_3609.webp
    76 KB · Views: 62
Last edited:

Top Member Reactions

Back
Top Bottom