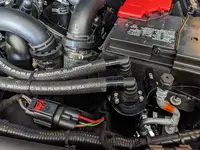
SO...I just learned a lesson. Just because you don't see liquid sloshing around doesn't mean there isn't anything there. If you take a look at the image of the can that I showed earlier it appears dry as a bone.
I decided to remove the system while I did some more investigating to make sure I wasn't causing any issues by having it installed. It's <10 min job so no big deal. But when I took a closer look at the can it occurred to me that there was some brownish coloring near the magnet AND is seemed the slightest bit uneven (there's a crescent-shaped area in the top-left of the image). So I stuck a flathead down there and quickly realized it wasn't 'dry' as much as it was a thick sludge that gave the appearance of being dry.
So a few minutes of cleaning it out w/ paper towels and then re-install. So apparently it is catching some crud, but for some reason in mine it's drying out pretty quickly.
Lesson Learned here is I may just need to check more frequently to catch it before it has a chance to dry out (as in monthly ???).
View attachment 11142
View attachment 11143
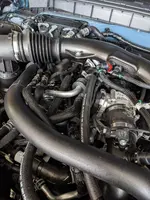
") . It will be interesting to see how much Oil and fluids we get in our catch cans.
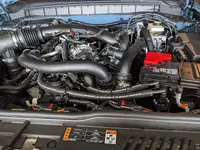
. It will be interesting to see how much Oil and fluids we get in our catch cans. is so large I had to crawl up into the engine compartment to gain access.
  No amount of effort with a hook pick would release the black cover on the orange fitting. The
 ![0530232041a[1].jpg](https://www.broncoraptor.com/data/attachments/4/4651-cf28b5f0a0417b2311370f4a00e471f4.jpg?hash=iLY6fRn2b_ "0530232041a[1].jpg")
![0530232041~3[1].jpg](https://www.broncoraptor.com/data/attachments/4/4653-97e1b839ccc68a9b04c5fef67ddb4527.jpg?hash=4mPsBiVGBA "0530232041~3[1].jpg")
![0530232042a~2[1].jpg](https://www.broncoraptor.com/data/attachments/4/4654-aca2a6a427b3dc1bad65bea00c3647d3.jpg?hash=B4wmBAj1gW "0530232042a~2[1].jpg")

")