Rubicon Trail

JohnGalt

Well-known member
Founding Member
🏆 BR of the Month 🏆
May 25, 2022
482
Gallery
209
1,172
Sacramento/Tahoe
Current Ride
2022 Bronco Raptor
Current Ride #2
2023 Land Rover Defender 110
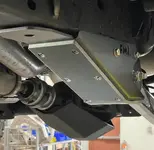
Not that Ford possibly might make a mistake in their parts catalog, but that bracket for the Raptor in the diagram looks nothing like the bracket on my truck.

the leading bracket on the passenger side is actually pretty well protected as skid plates run close by and appear a little lower than the bracket bottom.

the driver side is more exposed as the muffler runs beside it. My drivers side is already a little ground on the bottom.

that said, the brackets are pretty stout, nicely
IMG_1903.jpeg
ramped and hang well below the arm pivot. Doesn’t appear to be any easy attachment point to add a skid. It would have been nice if they boxed in some of the bottom, but not sure if that would impact ease of assembly/disassembly or not.

While Kevin clearly hit his passenger bracket, was probably more hung up on his skids than the lower arm brackets. It looked like the passenger bracket was clear and the truck was hung up pivoting on the underbody skids
 
OP
ChiliPepper

ChiliPepper

Well-known member
🏆 BR of the Month 🏆
Dec 3, 2022
509
Gallery
437
944
Cottonwood Heights, UT
Current Ride
Ford Bronco Raptor
Current Ride #2
Jeep Cherokee Trailhawk
First Responder
27 yrs SAR, Wilderness EMT, retired
  • Thread Starter
  • Thread starter
  • #23
I can't see what Kevin was hung up from the video angle, but he clearly needed a winch pull. As you noted, the bracket clearly took a strike. They complained about the same bracket on the Chinaman. I've struck both of mine in the past, but slid past the step I was climbing.

Other than the rear diff, said bracket is the lowest hanging fruit; especially for the breakover angle. The muffler [6] sits higher than the bracket [2]. I used to lament that 33" tires didn't give me enough clearance. Now with 37" tires (36.5"), I'm likely to say the same thing. Note that the purple 2dr Jeep in the video was on 40s.

My RCI sliders [1] mount to the frame [5] so I don't have a lot of room for a bracket [2] modification. That said, there may be some room to weld a bracket extension [3] and a skid [4]. Or just use my winch on the front.

1691706894528.png


The 🌶️ Raptor looks like she needs a bath. :ROFLMAO: Every time I wash her she just gets dirty again. :unsure:
 
Last edited:
OP
ChiliPepper

ChiliPepper

Well-known member
🏆 BR of the Month 🏆
Dec 3, 2022
509
Gallery
437
944
Cottonwood Heights, UT
Current Ride
Ford Bronco Raptor
Current Ride #2
Jeep Cherokee Trailhawk
First Responder
27 yrs SAR, Wilderness EMT, retired
  • Thread Starter
  • Thread starter
  • #24
Here is another (parts catalog) view of the BR bracket. It looks pretty close to real life.

1691707801986.png
 

JohnGalt

Well-known member
Founding Member
🏆 BR of the Month 🏆
May 25, 2022
482
Gallery
209
1,172
Sacramento/Tahoe
Current Ride
2022 Bronco Raptor
Current Ride #2
2023 Land Rover Defender 110
I can't see what Kevin was hung up from the video angle, but he clearly needed a winch pull. As you noted, the bracket clearly took a strike. They complained about the same bracket on the Chinaman. I've struck both of mine in the past, but slid past the step I was climbing.

Other than the rear diff, said bracket is the lowest hanging fruit; especially for the breakover angle. The muffler [6] sits higher than the bracket [2]. I used to lament that 33" tires didn't give me enough clearance. Now with 37" tires (36.5"), I'm likely to say the same thing. Note that the purple 2dr Jeep in the video was on 40s.

My RCI sliders [1] mount to the frame [5] so I don't have a lot of room for a bracket [2] modification. That said, there may be some room to weld a bracket extension [3] and a skid [4]. Or just use my winch on the front.

View attachment 9332

The 🌶️ Raptor looks like she needs a bath. :ROFLMAO: Every time I wash her she just gets dirty again. :unsure:
I’ll be putting those sliders on soon hopefully. Looking at something like JCR skids for Bronco, there is a bolt above the pivot in the bracket, but no easy attachment to the frame (even before sliders). There’s no bolt hole and no easy access to place a nut in the frame if you’re willing to drill.

I wonder if I could weld a little wheel in front of the brackets and just roll over stuff? 🤪🤪

IMG_1904.jpeg
 

TurboS

Moderator
Staff member
Founding Member
Feb 24, 2022
2,577
Gallery
738
3,597
Michigan
Current Ride
2022 Bronco Raptor
The Bronco Raptor bracket doesn't hang lower, just a more abrupt angle so rather than sliding over obstacles it appears to need to be lifted over. Doesn't hang any lower.

IMG_5247.jpeg


Badlands has better angle for sliding and is very close to same distance from frame but definitely a different bracket.

IMG_5246.jpeg


Welded mini slider part number.. maybe "50425 AC" inside of slider is "088 23"
IMG_5252.jpeg


In this later pic above of the Badlands bracket, is now part of the frame mounted LOD Detroyer frame mounted Rock Sliders. Wife wanted steps, so we went with frame mounted rock slider steps.

IMG_5235.jpeg
 

TurboS

Moderator
Staff member
Founding Member
Feb 24, 2022
2,577
Gallery
738
3,597
Michigan
Current Ride
2022 Bronco Raptor
I’ll be putting those sliders on soon hopefully. Looking at something like JCR skids for Bronco, there is a bolt above the pivot in the bracket, but no easy attachment to the frame (even before sliders). There’s no bolt hole and no easy access to place a nut in the frame if you’re willing to drill.

I wonder if I could weld a little wheel in front of the brackets and just roll over stuff? 🤪🤪

View attachment 9335
I was also thinking rollers, just Hit it and roll over it. Hmm, I don't have any off-road experience.. ya don't listen to me. :giggle:
 

JohnGalt

Well-known member
Founding Member
🏆 BR of the Month 🏆
May 25, 2022
482
Gallery
209
1,172
Sacramento/Tahoe
Current Ride
2022 Bronco Raptor
Current Ride #2
2023 Land Rover Defender 110

JohnGalt

Well-known member
Founding Member
🏆 BR of the Month 🏆
May 25, 2022
482
Gallery
209
1,172
Sacramento/Tahoe
Current Ride
2022 Bronco Raptor
Current Ride #2
2023 Land Rover Defender 110
I can't see what Kevin was hung up from the video angle, but he clearly needed a winch pull. As you noted, the bracket clearly took a strike. They complained about the same bracket on the Chinaman. I've struck both of mine in the past, but slid past the step I was climbing.

Other than the rear diff, said bracket is the lowest hanging fruit; especially for the breakover angle. The muffler [6] sits higher than the bracket [2]. I used to lament that 33" tires didn't give me enough clearance. Now with 37" tires (36.5"), I'm likely to say the same thing. Note that the purple 2dr Jeep in the video was on 40s.

My RCI sliders [1] mount to the frame [5] so I don't have a lot of room for a bracket [2] modification. That said, there may be some room to weld a bracket extension [3] and a skid [4]. Or just use my winch on the front.

View attachment 9332

The 🌶️ Raptor looks like she needs a bath. :ROFLMAO: Every time I wash her she just gets dirty again. :unsure:
Supposedly my RCI sliders will ship tomorrow. I assume you installed yourself, any tips / tricks someone lazy and easily frustrated like me should be aware of in the install?

Probably most concerned on what I’ll need to do related to the gas tank and it’s skid.

TIA for any info
 

TurboS

Moderator
Staff member
Founding Member
Feb 24, 2022
2,577
Gallery
738
3,597
Michigan
Current Ride
2022 Bronco Raptor
Supposedly my RCI sliders will ship tomorrow. I assume you installed yourself, any tips / tricks someone lazy and easily frustrated like me should be aware of in the install?

Probably most concerned on what I’ll need to do related to the gas tank and it’s skid.

TIA for any info
As a precaution, low fuel level thereby lightening the gas tank. On the LOD frame mounts, the rear mount was inserted between the frame and gas tank skid on the back two outside skid bolts to frame. I ended up loosening all the gas tank skid bolts in order to gain enough clearance. With low fuel, there didn't seem to be much stress on the skid bolts holding the gas tank and I could easily push the skid tank combo upward if needed. Guessing you may need to do similiar with the RCI frame mounts.

IMG_5445.jpeg


Also, I used a couple bottle jacks to hold (push) the mount in place against the frame while I bolted the mount to the frame.
Use caution as these sliders are heavy, would be easy to slip and end up with a slider rotating and contacting the body.
 
Last edited:
OP
ChiliPepper

ChiliPepper

Well-known member
🏆 BR of the Month 🏆
Dec 3, 2022
509
Gallery
437
944
Cottonwood Heights, UT
Current Ride
Ford Bronco Raptor
Current Ride #2
Jeep Cherokee Trailhawk
First Responder
27 yrs SAR, Wilderness EMT, retired
  • Thread Starter
  • Thread starter
  • #33
Supposedly my RCI sliders will ship tomorrow. I assume you installed yourself, any tips / tricks someone lazy and easily frustrated like me should be aware of in the install?

Probably most concerned on what I’ll need to do related to the gas tank and it’s skid.

TIA for any info
I think I did a write-up back in May. The pinch seam covers were the tricky part; cut to length. No issues with the removal of the OEM parts. No issues with installing the RCI sliders. I did not drain my full gas tank prior to the install. A ratchet wrench was helpful in the tight spots.
 

TurboS

Moderator
Staff member
Founding Member
Feb 24, 2022
2,577
Gallery
738
3,597
Michigan
Current Ride
2022 Bronco Raptor
Supposedly my RCI sliders will ship tomorrow. I assume you installed yourself, any tips / tricks someone lazy and easily frustrated like me should be aware of in the install?

Probably most concerned on what I’ll need to do related to the gas tank and it’s skid.

TIA for any info
Also preparation of the frame, the nasty dirty part. LOD recommended the grinding the excess weld beads, on the bottom of the frame in the areas where the brackets will mount, so that the bottom of the frame is perfectly flat so the brackets fit flush against the bottom of the frame. Use a hand grinder with flap disk but beware there will be grinding dust everywhere. Eye protection, gloves, and face mask are a must. After grinding I painted with Blacktop epoxy chassis paint and allowed to dry at least 24 hours. I remember now that is why I dropped the gas tank skid lower to get the grinding disk between the skid plate mounting tabs and frame.
Of course, check the RCI install instructions first.

Tools I used:

60 Grit, I went thru 3 of these disks in this 10 pack.
 
Last edited:

JohnGalt

Well-known member
Founding Member
🏆 BR of the Month 🏆
May 25, 2022
482
Gallery
209
1,172
Sacramento/Tahoe
Current Ride
2022 Bronco Raptor
Current Ride #2
2023 Land Rover Defender 110
I think I did a write-up back in May. The pinch seam covers were the tricky part; cut to length. No issues with the removal of the OEM parts. No issues with installing the RCI sliders. I did not drain my full gas tank prior to the install. A ratchet wrench was helpful in the tight spots.
Thanks, I just went back and found your write up on the pinch seam covers.

I’m guessing that you had to trim the covers to work around the two bolts on seam line behind the front wheel well.

I saw the JCR covers bolted down the covers with these bolts on a regular 4 Dr Bronco.

Do you know if these are different on the BRaptor ( @TurboS may know as he has both) and that’s why the trimming was necessary?
 

TurboS

Moderator
Staff member
Founding Member
Feb 24, 2022
2,577
Gallery
738
3,597
Michigan
Current Ride
2022 Bronco Raptor
Thanks, I just went back and found your write up on the pinch seam covers.

I’m guessing that you had to trim the covers to work around the two bolts on seam line behind the front wheel well.

I saw the JCR covers bolted down the covers with these bolts on a regular 4 Dr Bronco.

Do you know if these are different on the BRaptor ( @TurboS may know as he has both) and that’s why the trimming was necessary?
The wife's white Bronco Badlands vs. CO Raptor. I added Ford accessories rocker panel trail armor to her Badlands so I took pics from below. It appears to me that the front lower fender bolts are in the same location but the Raptor composite fender has the extra support piece. @JohnGalt Is this helpful/what you needed for comparison?

IMG_5448.jpeg

IMG_5449.jpeg
 
Last edited:

JohnGalt

Well-known member
Founding Member
🏆 BR of the Month 🏆
May 25, 2022
482
Gallery
209
1,172
Sacramento/Tahoe
Current Ride
2022 Bronco Raptor
Current Ride #2
2023 Land Rover Defender 110
The wife's white Bronco Badlands vs. CO Raptor. I added Ford accessories rocker panel trail armor to her Badlands so I took pics from below. It appears to me that the front lower fender bolts are in the same location but the Raptor composite fender has the extra support piece. @JohnGalt Is this helpful/what you needed for comparison?

View attachment 10025
View attachment 10026
Thank you, this was very helpful! With your pics and Chilipepper‘s photo (below), it looks like the support for the front fender is the culprit. It looks like he tucked the seam cover into the gap visible in your photo or may have gotten the rearmost bolt through the seam cover. i just can’t see it clearly enough.

Well, at least I know why it needs trimming and leaning toward just tucking it in vs trying to thread the bolt through as I think it’s going to affect the paint.

… and it looks pretty straightforward

Now I’m thinking does the marginal improvement in looks offset the fact that it creates a place for water and dirt to fester between the seam and the cover?

thanks again, all
IMG_1997.jpeg

IMG_1996.jpeg
 

TurboS

Moderator
Staff member
Founding Member
Feb 24, 2022
2,577
Gallery
738
3,597
Michigan
Current Ride
2022 Bronco Raptor
Thank you, this was very helpful! With your pics and Chilipepper‘s photo (below), it looks like the support for the front fender is the culprit. It looks like he tucked the seam cover into the gap visible in your photo or may have gotten the rearmost bolt through the seam cover. i just can’t see it clearly enough.

Well, at least I know why it needs trimming and leaning toward just tucking it in vs trying to thread the bolt through as I think it’s going to affect the paint.

… and it looks pretty straightforward

Now I’m thinking does the marginal improvement in looks offset the fact that it creates a place for water and dirt to fester between the seam and the cover?

thanks again, all
View attachment 10029
View attachment 10030
Do those metal pinch weld covers provide any mechanical advantage such as providing additional support in case the frame mounted slider bracket would flex enough to contact the pinch weld?

I choose to get these lower panel covers that offer full stone impingement protection. Easiest to install before your frame mounted sliders. For our Bronco Raptors, there will need to be some of the very front edge cut off as the lower fender on our Raptor's is shorter, noticable in my photo's above. I'm planning to order and install on my Bronco Raptor this winter.


We think they provide a "finished" look. The are stuck on with 3m body molding tape, continous seal along outside (top) edge, front, and back edge. The raised section to clear our OEM rock rail mounts to the pinch weld allow ventilation. These do not fit tight against the paint, only the 3m molding tape contacts the paint.

IMG_5336.jpeg

IMG_5335.jpeg
 

JohnGalt

Well-known member
Founding Member
🏆 BR of the Month 🏆
May 25, 2022
482
Gallery
209
1,172
Sacramento/Tahoe
Current Ride
2022 Bronco Raptor
Current Ride #2
2023 Land Rover Defender 110
those look like they’ll do the trick! I suppose the metal covers would provide additional protection in the event something unexpected happened, but probably not a lot of protection.

im just going to make an install / no install decision at the last minute. Didn’t really think the seam covers all the way through. Bought them since it seemed like all the other kids had them!
 
OP
ChiliPepper

ChiliPepper

Well-known member
🏆 BR of the Month 🏆
Dec 3, 2022
509
Gallery
437
944
Cottonwood Heights, UT
Current Ride
Ford Bronco Raptor
Current Ride #2
Jeep Cherokee Trailhawk
First Responder
27 yrs SAR, Wilderness EMT, retired
  • Thread Starter
  • Thread starter
  • #40
Thank you, this was very helpful! With your pics and Chilipepper‘s photo (below), it looks like the support for the front fender is the culprit. It looks like he tucked the seam cover into the gap visible in your photo or may have gotten the rearmost bolt through the seam cover. i just can’t see it clearly enough.

Well, at least I know why it needs trimming and leaning toward just tucking it in vs trying to thread the bolt through as I think it’s going to affect the paint.

… and it looks pretty straightforward

Now I’m thinking does the marginal improvement in looks offset the fact that it creates a place for water and dirt to fester between the seam and the cover?

thanks again, all
Well, if you're worried about dirt, rain or snow, then keep it parked in the garage or visit a car wash. 🤣
The 'edge' of the pinch seam cover is a bigger collector of mud. Wash it good.
 

Top Member Reactions

Top