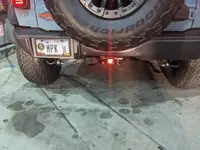
Continuing the reverse light theme, I finally decided on and installed my reverse light / chase light “solution” today.
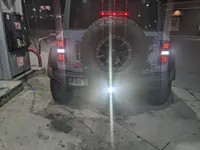
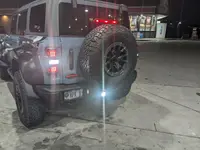
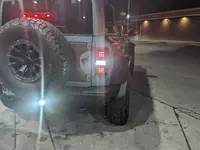
I ended up going with a pair of Diode Dynamics SS2 Pros with clear spot /flood lenses (and red backlighting), the Diode Dynamics wiring harness, amber lens covers and a Fast Intentions spare tire mount bracket.
The installation went pretty well, but you do have to get into a LOT of places, especially for the optional Auxilliary Switch wiring. DD has a very good install video that covers the entire install in pretty good detail. However they are using a 2DR Bronco. Key differences are there’s no muffler / heat shielding to deal with (easier on Raptor) and fishing the optional aux harness under the interior trunk panels (harder as the panel is longer). The DD video is a good resource regardless of the lights you choose.
ive said it before, I’ll say it again, ”why couldn’t those sadistic engineers at Ford given us an extra foot of wire on all the Aux wiring end points?”. They took what was a brilliant concept and made it a PITA to actually implement in a number of hard to get at places. That said, I’m still glad they pre-wired everything.
Fast Intentions Raptor specific bracket is well made, sturdy and includes all necessary hardware. It’s just really expensive for what it is.
DD Bronco wiring harness works perfectly on the Bronco Raptor. It includes the harness that pigtails into the taillight harness for reverse light trigger and parking lights for the back light, optional plug and play upfitter harness so you can manually turn on/off the lights with Aux or other switch for Chase/work light functionality (or managing the odd tailgater) and a DT connector splitter for connecting to two closely located lights (like on spare tire mount). All this for $80 seems like a bargain, whether you use DD lights or not.
The lights are bright as hell, despite opting for more diffuse lenses. I probably would have opted for the standard lights vs. Pros, if I had it to do over. I think the optional amber lens covers do make it a more bearable chase light for those behind me.
After installing I dashed off to the cabin in the defender to ski for a couple days (finally some snow is coming) so I wont get a chance to test reverse lights at night for awhile , but I’m not anticipating being under lit by a pretty wide margin.
Note: I would have just gotten the full DD Bronco reverse light kit, but they only make a Bronco specific spare tire bracket.
much much brighter with naked eye versus the camera.
View attachment 11369
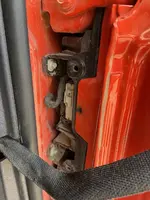
pigtail is a tight fit to get pigtail Plugged in and tucked away. Kind of a pain to pull the OEM plug apart. Definitely orient the harness wiring before plugging it in so it fits neatly.
View attachment 11374
This is the way the video tells you to route harness as it comes down through the bumper. I decided to go behind the bolt/bushing but then still go through the frame as seen on the right. I think this reduces the risk of something snagging the harness
View attachment 11371
fishing the splitter through the tailgate was easy, just pick the option under the flap that gives most direct fit.
View attachment 11372
Splitter as it comes through the tire mount, there is way more slack than shown here, but not a lot of wiggle room once the tire is installed.
View attachment 11373